
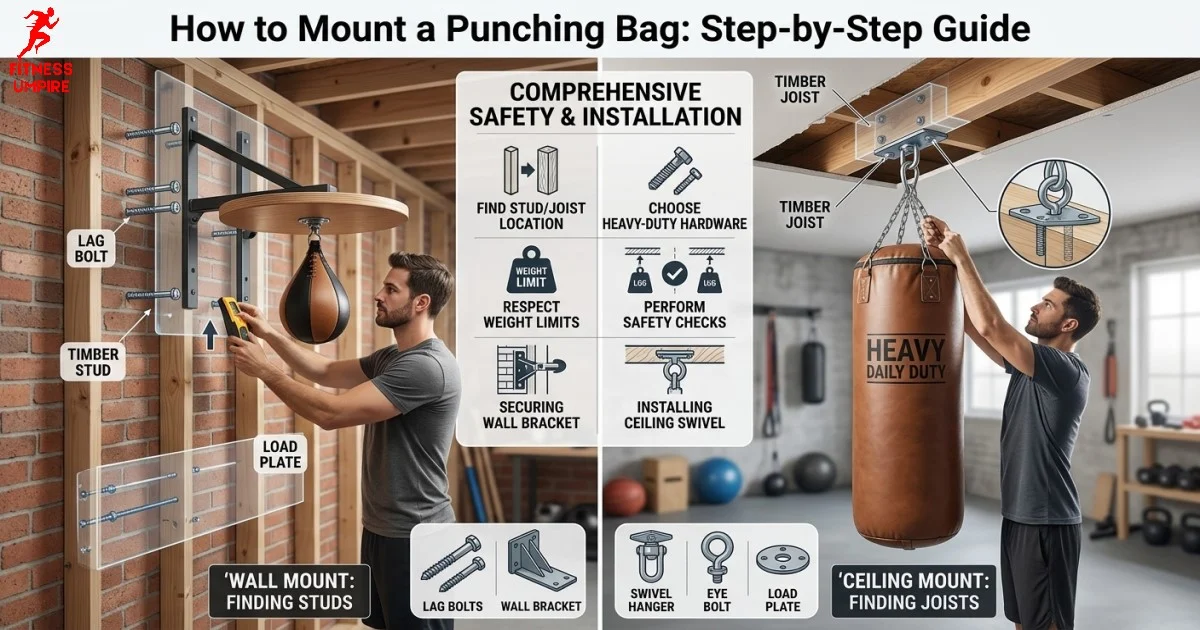
Mounting a punching bag safely starts with one rule: attach the mounting hardware to the building’s structural framing—not just drywall or plaster. For a ceiling mount, that usually means a properly sized ceiling joist or a structural beam. For a wall mount, the bracket should be secured into wall studs or another structural support capable of handling the bag’s movement.
A heavy bag doesn’t simply hang straight down. Every punch and kick creates swinging and pulling forces, so the mounting point needs to handle more than the bag’s static weight.
This guide covers how to locate studs and joists, choose hardware, install a ceiling or wall mount, understand weight limits, and avoid common mounting mistakes.
What You Need to Mount a Punching Bag
Before drilling, identify the type of structure you’re attaching to and gather the appropriate hardware.
Basic hardware checklist
| Item | Purpose |
|---|---|
| Heavy-duty punching bag mount | Connects the bag to the ceiling or wall |
| Lag screws or structural screws | Secure the mount to wood framing |
| Heavy-duty eye bolt or mounting point | Connects the bag’s chain or strap |
| Drill/driver | Creates pilot holes and drives fasteners |
| Drill bits | Pilot holes appropriate for the framing and hardware |
| Stud finder | Helps locate wall studs or ceiling joists |
| Socket/wrench | Tightens structural fasteners |
| Tape measure | Checks spacing and installation position |
| Level | Helps keep a wall-mounted bracket properly aligned |
| Ladder/step stool | Provides safe access to ceiling mounting points |
| Safety glasses | Protects your eyes while drilling |
The exact screws, bolts, washers, and anchors depend on the mounting system and the structure you’re attaching it to. Follow the mounting hardware manufacturer’s specifications rather than choosing fasteners based only on the bag’s weight.
Can You Mount a Punching Bag to Drywall?
Do not mount a heavy punching bag directly to drywall using ordinary drywall anchors.
Drywall is a wall covering, not structural framing. A punching bag can weigh dozens of pounds before you even start hitting it, and the repeated swinging creates additional forces at the mounting point.
A small drywall anchor that works for a picture, shelf, or lightweight fixture isn’t automatically suitable for a heavy bag.
Instead, locate the structural member behind the drywall and fasten the mount directly to it.
For wood-framed construction, this generally means:
- Wall studs
- Ceiling joists
- Structural beams
- Other appropriately sized structural framing
If you have metal studs, concrete, brick, masonry, or an unusual ceiling structure, don’t assume wood-framing installation instructions apply. Use hardware specifically rated for that substrate and, when necessary, get advice from a qualified professional.
How to Find a Wall Stud or Ceiling Joist
Finding the framing is one of the most important parts of the installation.
1. Use a stud finder
A stud finder can help identify framing behind drywall. Move it across the area where you plan to install the mount and mark the suspected stud or joist location.
Don’t rely on a single reading. Scan from several directions and confirm the location before drilling.
2. Look for clues around the room
Electrical outlets, switches, door frames, and other fixtures can sometimes provide clues about framing locations, although their positions shouldn’t be treated as guaranteed measurements.
In many traditionally framed walls, studs are spaced at regular intervals, but construction varies.
3. Confirm the framing
A stud finder’s reading is not the same thing as proof that you’ve identified a suitable structural member.
Before committing to the installation, confirm that your intended fastener location actually provides solid structural material behind the wall or ceiling surface.
If you’re uncertain about what’s behind the surface, stop before drilling.
Ceiling vs. Wall Mounting
The best mounting method depends on your room and the structure available.
| Mounting method | What it attaches to | Main consideration |
|---|---|---|
| Ceiling mount | Ceiling joist or structural beam | Requires suitable overhead framing |
| Wall bracket | Wall studs or structural support | Bracket must transfer force into framing |
| Beam mount | Structural beam | Must accommodate the mounting hardware |
| Masonry mount | Suitable concrete/brick structure | Requires substrate-specific hardware |
| Drywall-only mount | Drywall | Not appropriate for a typical heavy bag |
A ceiling mount allows the bag to move naturally, but it requires reliable overhead support.
A wall-mounted bracket can work well when suitable studs are available and may be more convenient in rooms where ceiling access is difficult.
How to Mount a Punching Bag to the Ceiling
Once you’ve confirmed the ceiling has suitable structural support, you can install the mounting hardware.
Step 1: Choose the mounting location
Pick a location with enough room for the bag to swing without hitting walls, furniture, lights, doors, or other obstacles.
Remember that the bag won’t remain stationary while you’re training.
Leave enough clearance around the bag for your normal punching and kicking movements.
Also check the ceiling height. The bag should hang at a practical height for the type of training you intend to perform.
Step 2: Locate the ceiling joist or beam
Use your stud finder and other available methods to identify the structural member.
Mark the center of the joist or beam where the mounting hardware will be installed.
Do not guess based on the drywall alone.
Step 3: Position the mount
Hold the mounting plate against the ceiling and mark the fastener holes.
Check that the holes line up with the structural framing required by the mount.
If the mounting plate requires multiple attachment points, make sure each required fastener is installed according to the manufacturer’s instructions.
Step 4: Drill the pilot holes
Use the correct drill bit to create pilot holes for the specified structural screws or lag screws.
The pilot-hole size and depth depend on the fastener and the framing material.
Don’t simply use a random drill bit based on the screw’s appearance.
Step 5: Secure the mounting plate
Install the structural fasteners through the mounting plate and into the joist or beam.
Tighten them securely without damaging the wood or hardware.
The mounting plate should sit firmly against the mounting surface with no significant movement.
Step 6: Attach the bag hardware
Install the eye bolt, hook, swivel, chain, strap, or other connection specified by your punching bag and mount.
Make sure every component is properly seated before hanging the bag.
Step 7: Hang the bag
Attach the bag according to the manufacturer’s instructions.
Before beginning a workout, inspect the entire connection:
- Mounting plate
- Screws or bolts
- Eye bolt or hook
- Swivel
- Chains or straps
- Bag attachment points
If anything shifts, bends, loosens, or makes an unusual noise, stop and investigate the installation.
How to Mount a Punching Bag to a Wall
A wall-mounted punching bag bracket works differently from a simple ceiling hook.
The bracket spreads the load across its attachment points, but those attachment points still need to connect to suitable structural framing.
Step 1: Find the studs
Locate the studs where the bracket will be installed.
Ideally, position the bracket so its required fasteners engage the structural members specified by the bracket manufacturer.
Step 2: Position and level the bracket
Hold the bracket against the wall at the desired height.
Use a level to check its position and mark the mounting holes.
Make sure the bag will have adequate clearance from the wall and surrounding objects.
Step 3: Drill the required pilot holes
Drill pilot holes according to the fastener manufacturer’s specifications.
If the bracket calls for specific structural screws or lag screws, use those rather than substituting ordinary screws.
Step 4: Secure the bracket
Install and tighten the fasteners through the bracket and into the structural framing.
Check that the bracket is firmly attached and doesn’t rock or pull away from the wall.
Step 5: Attach and inspect the bag
Connect the bag to the bracket using the supplied or specified hardware.
Test the installation carefully before beginning normal training.
How Much Weight Can a Punching Bag Mount Hold?
There isn’t one universal weight limit for a punching bag mount.
The safe capacity depends on the entire installation system, including:
- The punching bag’s weight
- The mounting hardware
- The fasteners
- The ceiling joist, beam, or wall framing
- The substrate
- The mounting location
- The forces generated while the bag swings and is struck
A mount advertised for a particular maximum bag weight does not automatically mean every ceiling or wall can support that weight.
For example, a mounting bracket may have a manufacturer’s stated capacity, but the actual installation still depends on whether the structural member and fasteners are appropriate.
Never treat the bag’s static weight as the only load involved. Punching and kicking create movement, and that movement transfers force to the mounting system.
If you’re installing a particularly heavy bag, using a nonstandard structure, or aren’t sure about the framing, consult a qualified contractor or other appropriate professional before installation.
Safety Checks Before You Train
After installation, don’t immediately start with your hardest punches.
Perform a careful inspection first.
Check the mounting point
Look for:
- Loose screws or bolts
- Cracked or damaged mounting material
- Movement between the mount and structure
- Bent hardware
- Damaged chains or straps
- Improperly seated hooks or connectors
Check the surrounding area
Make sure the bag cannot strike:
- Ceiling fixtures
- Light fittings
- Walls
- Windows
- Doors
- Furniture
- Other people or objects
Keep the training area clear.
Inspect the mount periodically
A punching bag mounting system experiences repeated loading every time the bag moves.
Make inspection part of your regular equipment maintenance. If you notice loosening, cracking, deformation, or other damage, stop using the bag until the problem has been properly addressed.
Common Punching Bag Mounting Mistakes
Using drywall anchors
This is one of the most important mistakes to avoid. Ordinary drywall anchors aren’t a substitute for structural attachment.
Mounting without finding the framing
A bracket can look securely installed while its fasteners are only gripping the wall covering.
Find the structural support first.
Using undersized hardware
The correct fastener depends on the mount and substrate. Don’t choose screws simply because they fit through the mounting holes.
Ignoring the bag’s movement
A heavy bag is dynamic equipment. Leave enough space for it to swing and make sure the mounting system is designed for that type of use.
Forgetting to inspect the installation
Even a correctly installed mount should be checked periodically for loosening or damage.
Assuming every ceiling is the same
A wood-framed ceiling, concrete ceiling, and suspended ceiling require different approaches. Never assume that hardware designed for one substrate is appropriate for another.
What If You Rent or Don’t Want Holes in the Ceiling?
If you’re renting, don’t have permission to drill, or simply don’t want to modify the ceiling or wall, a freestanding punching bag is an alternative worth considering.
Freestanding bags have their own base and don’t require a ceiling mounting point. That makes them useful when permanent installation isn’t practical.
However, they still need sufficient floor space and a stable setup area.
For an overview of this type of equipment, see our guide to freestanding punching bags. If you’re ready to compare specific options, see our guide to the best freestanding punching bags.
FAQs
Can I hang a punching bag from drywall?
No. A typical heavy punching bag should not be mounted to drywall using ordinary drywall anchors. The mounting system should transfer its load into suitable structural framing or another appropriately rated structural substrate.
Can I mount a punching bag to a ceiling joist?
Yes, provided the joist and mounting hardware are suitable for the installation. Follow the mount manufacturer’s specifications for fasteners, spacing, and weight capacity.
Can I mount a punching bag to a wall stud?
A wall-mounted punching bag bracket can be attached to suitable wall framing when the bracket and fasteners are designed for that application. Follow the bracket manufacturer’s installation requirements.
Is a ceiling mount or wall mount better?
Neither is universally better. The appropriate choice depends on your available structural support, room layout, ceiling height, desired bag movement, and the mounting system you’re using.
How heavy can a punching bag be?
There is no single safe weight for every installation. The relevant limit depends on the bag, mount, fasteners, and structural support. Use the manufacturer’s stated limits and make sure the building structure is appropriate for the installation.
Do I need a stud finder?
A stud finder is a useful tool for locating framing behind drywall, but you should still verify that the identified location is appropriate for the mounting hardware before drilling.
Can I install a punching bag without drilling?
Yes. A freestanding punching bag avoids the need to drill into a ceiling or wall. It can be a practical alternative for renters or rooms where permanent mounting isn’t suitable.
Conclusion
The key to mounting a punching bag safely is structural support. Find the appropriate wall stud, ceiling joist, beam, or other suitable structure before choosing your fasteners. Avoid relying on ordinary drywall anchors, use hardware specified for the mounting system and substrate, and account for the movement created during training.
Before every workout, make sure the mount, fasteners, connection hardware, and surrounding area remain in good condition.
If permanent mounting isn’t practical, a freestanding punching bag eliminates the need for ceiling or wall attachment while giving you another way to train at home.